
The datamap add-in creates a Microsoft Word ribbon tab with the following groups and options:
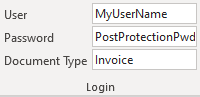
Login
The Login group concerns logging into the online account in order to download maps for batch processing or local testing.
The taskpane looks to these credentials when the Refresh button is clicked.
User
The datamap user name you used to sign up for the online account.
This is not necessarily your email address and the two are not interchangeable. If you have forgotten your user name please use the Lost your password? feature on the my account page, or contact datamap support.
Password
The password for protected document types in the online account (which are WordPress posts). You only need to specify this in the interface if you have protected the specified document type(s) with a password.
Note This is not necessarily the password for your online account.
Document Type
The document types to use for processing either the open test document or the specified folder.
Using one document type at a time is the simplest configuration, however you can specify a pipe-delimited list, for example:
Order Form|Order Table
The document types will be loaded in order and held in the memory of the batch processing service until it is stopped.
Any maps in the document / taskpane which are not within these document types will be considered unsynced. For more information, see sync status.
Batch
The Batch group contains the options for batch processing, where a folder of documents is monitored and processed by the background service.
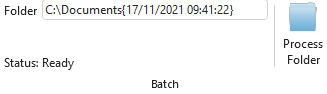
Folder
In this free-type box you can specify both a location and a time from which to start processing.
The path location must use backslash as the folder delimiter and may end with a backslash.
The time corresponds to the ‘last write time’ of the file – files with a write time after this will be processed. Must immediately follow the path (no space) and be in the timestamp format:
{DD/MM/YYYY HH:mm:ss}
Usually, setting this timestamp is handled automatically by the program to avoid duplicating work, as follows:
- When you double-click a specific document and this loads Microsoft Word for the first time, the current time will be applied to the timestamp. The assumption is that you only want to process documents that arrive in that folder from now on in the current business day.
- When you stop the batch processing service or there is an error, the ‘last write time’ of the last file successfully processed will be saved to the timestamp. This means that when you restart the service, datamap will not re-process the successful documents.
If these assumptions do not work for you, you can manually adjust the timestamp or configure your own initialisation logic in the script event RibbonLoad_BeforeFolderSet.
Process Folder / Stop Processing
Clicking this button once starts the background service, which will begin monitoring the specified folder and processing documents from the specified time. This is an asynchronous operation, which allows you to continue working in Microsoft Word while data is captured.
The service is single-threaded and will work on documents one at a time. After it has finished processing the group of documents it initially observed in the folder, it will look for any new documents and then work on that batch, and so on indefinitely.
Clicking the button again will stop / pause the service. As mentioned in the documentation for the Folder option, a timestamp will be added so that the service can pick up where it left off when you start it again in that session.
Status
This label reports the status of processing, including the document currently being processed out of the total documents observed in the current batch, or whether it is indefinitely monitoring for new documents.
The label will also report whether there has been an error, or whether the service has been manually stopped.
Test
The Test group contains the options for creating and working directly with individual test documents.
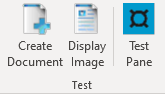
Create Document
When capturing data, maps always run within Microsoft Word (DOCX) files and this feature gives you an insight into how all supported files are normalised into these documents regardless of their original source format.
When you click this button, you can browse to your chosen file and the following conversion will take place:
- Electronic documents DOCX, DOC (legacy Microsoft Word format), RTF (rich text format) and TXT (pure text files) are opened directly into Microsoft Word.
- PDF files have their content adjusted in order to represent the document structure as best as possible inside Microsoft Word. Depending on the version of Microsoft Office and the makeup of PDF, this may or may not include OCR to make the text elements editable and searchable.
- TIF and JPG image files are imported as images into a blank document, saved out to PDF, and re-imported with OCR.
The document will be opened in a new Microsoft Word window and either be the file itself if opened directly, or a temporary / unsaved document if you selected an image file.
Display Image
If you are working on a test document created from an image file (TIF or JPG) it may be useful to reference the original image in order to review any OCR discrepancies, or remind yourself of the original layout.
The first time you click this button, you can browse to the original image file and it will be inserted with the correct alignment on top of the Microsoft Word document.
Note The OCR within the Microsoft Word document may extend onto more than a single page, whereas the original image will always fill the first page. This is a limitation of the possible re-alignment of image to OCR text.
After the image has been pulled into the document, you can use the button to toggle showing or hiding the image much more quickly.
Test Pane
This button is used to show or hide the taskpane, where you can test and develop individual maps or full solutions in the open test document.